Disclosure: Some links on this page are affiliate links. If you buy through them, we may earn a small commission at no extra cost to you. See our affiliate disclosure for details.
Day two, mid-afternoon. You lift the cooler lid and find the sausages floating in grey water next to a soggy bag of salad, and the milk is warm enough to worry about. The cooler was fine. The packing was not.
Here is the short answer. To pack a cooler for camping so it stays cold for days, chill the cooler and the food before you leave, use a mix of block ice and frozen bottles, pack in layers with the coldest things at the bottom, and open the lid as little as possible. Knowing how to pack a cooler properly matters more than the price of the box itself.
Table of contents
Start the night before
A cooler does not make anything cold. It only slows down warming. Put room temperature food into a room temperature box and the first bag of ice spends its whole life cooling plastic and foam.
- Bring the cooler indoors the evening before and drop in a sacrificial bag of ice or a few frozen bottles. Tip out the meltwater in the morning.
- Freeze what you can. Meat for day two or three, a pot of chilli, even a carton of juice. Frozen food is ice that you get to eat later.
- Fridge everything else overnight, drinks included. Warm cans dumped in at the last minute are a big reason ice vanishes on day one.
Plan meals before you pack, too. If you know Saturday is burgers and Sunday is a fry-up, you can pack in the order you will eat, which saves a lot of rummaging later. Our guide to the best camping cookware sets is worth a skim if you are planning proper meals rather than sandwiches.
Block ice, cubes or ice packs?
Each one does a different job, so most good setups use two of them.
Block ice lasts longest because it has less surface area. You can make your own by freezing water in an old ice cream tub or a large bottle. Frozen two litre bottles are, in my opinion, the most underrated trick in car camping. They stay sealed as they melt, so nothing gets soggy, and they turn into drinking water later.
Cubes are better for filling gaps and chilling drinks quickly, but they melt fast. Reusable packs are tidy and never make a puddle, though they usually give up sooner than a big block. A few reusable cooler ice packs are handy for a small lunch cooler or for topping up the gaps.
As a rough guide, many cooler makers suggest about twice as much ice as food for multi-day trips. That sounds like a lot, and for one night you can get away with less, but skimp on a long weekend and you will be buying a bag of ice at a garage by the second morning.
How to pack a cooler, layer by layer
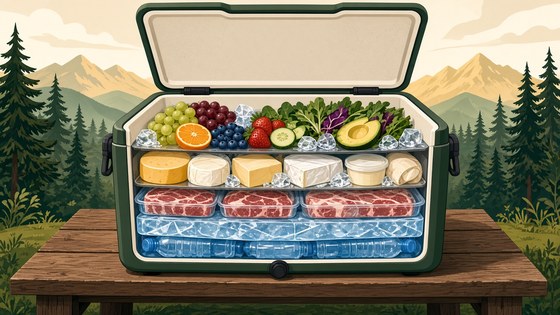
Cold air sinks, so the bottom of the cooler is the coldest place. Pack it like this:
- Bottom: block ice or frozen bottles, flat across the base.
- Next: raw meat and fish, frozen if possible, in sealed containers or double bagged. Keeping it low also means any drips cannot land on food you eat uncooked.
- Middle: dairy, eggs, cooked leftovers and anything for the first day or two.
- Top: salad, soft fruit, sandwiches and snacks, the things that bruise or freeze easily.
- Fill the gaps with cubes or small packs. Air space is the enemy, because air warms up faster than ice does.
Cardboard and paper packaging go soggy fast, so decant eggs, cheese and anything loose into leakproof food storage containers before the trip. They stack better too.
Last step before you close the lid: lay a towel or a folded foil blanket over the top layer. It is a small thing, but it acts as an extra lid inside the lid.
Why two coolers beat one
If you have space, keep drinks in one cooler and food in another. Drinks get opened all day long, by everyone, often by someone holding the lid up while they decide. Every one of those openings lets cold air spill out.
A separate drinks cooler means the food box might only be opened at mealtimes, and it stays cold far longer. It does not need to be fancy. A cheap soft cooler is fine for cans. If you are deciding what to buy, our round-up of the best coolers for car camping compares hard and soft options for different trip lengths.
Keeping it cold at camp
Once you arrive, where the cooler sits matters almost as much as how it was packed.
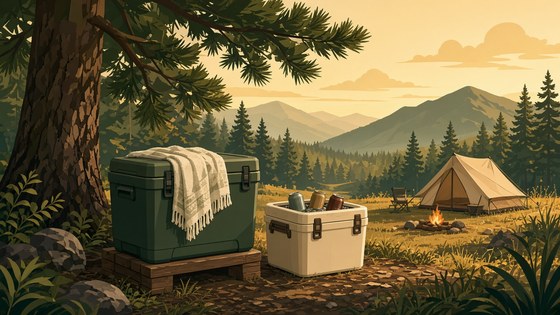
- Keep it in the shade all day, and move it as the sun moves. A car boot in direct sun gets hot quickly, so avoid leaving it in there.
- Raise it off hot ground on a block, a mat or a table. Throwing a light coloured towel or blanket over the top helps as well.
- Open it less. Decide what you need before you lift the lid, grab it, close it.
- Do not drain the meltwater straight away. Cold water still keeps things cold. Drain it when it reaches food that is not fully sealed, or when it starts to look murky.
For food safety, the aim is to keep chilled food at 5°C or below. A cheap fridge thermometer left inside takes the guesswork out of it. If raw meat has sat in warm water or the cooler has crept well above that for hours, throw it out. Nobody wants to spend a camping trip ill in a tent.
Keep the cooler shut and stowed at night too, ideally in the car. Foxes, crows and the odd badger have all worked out that a cooler means dinner. Our car camping checklist has the rest of the kitchen kit, from the camp stove to the washing up bowl.
Get the packing right and the cooler basically looks after itself. The cold sausages on day three are your reward.